
Interior Work In Dasna Ghaziabad
2025-12-24T09:25:31  read more
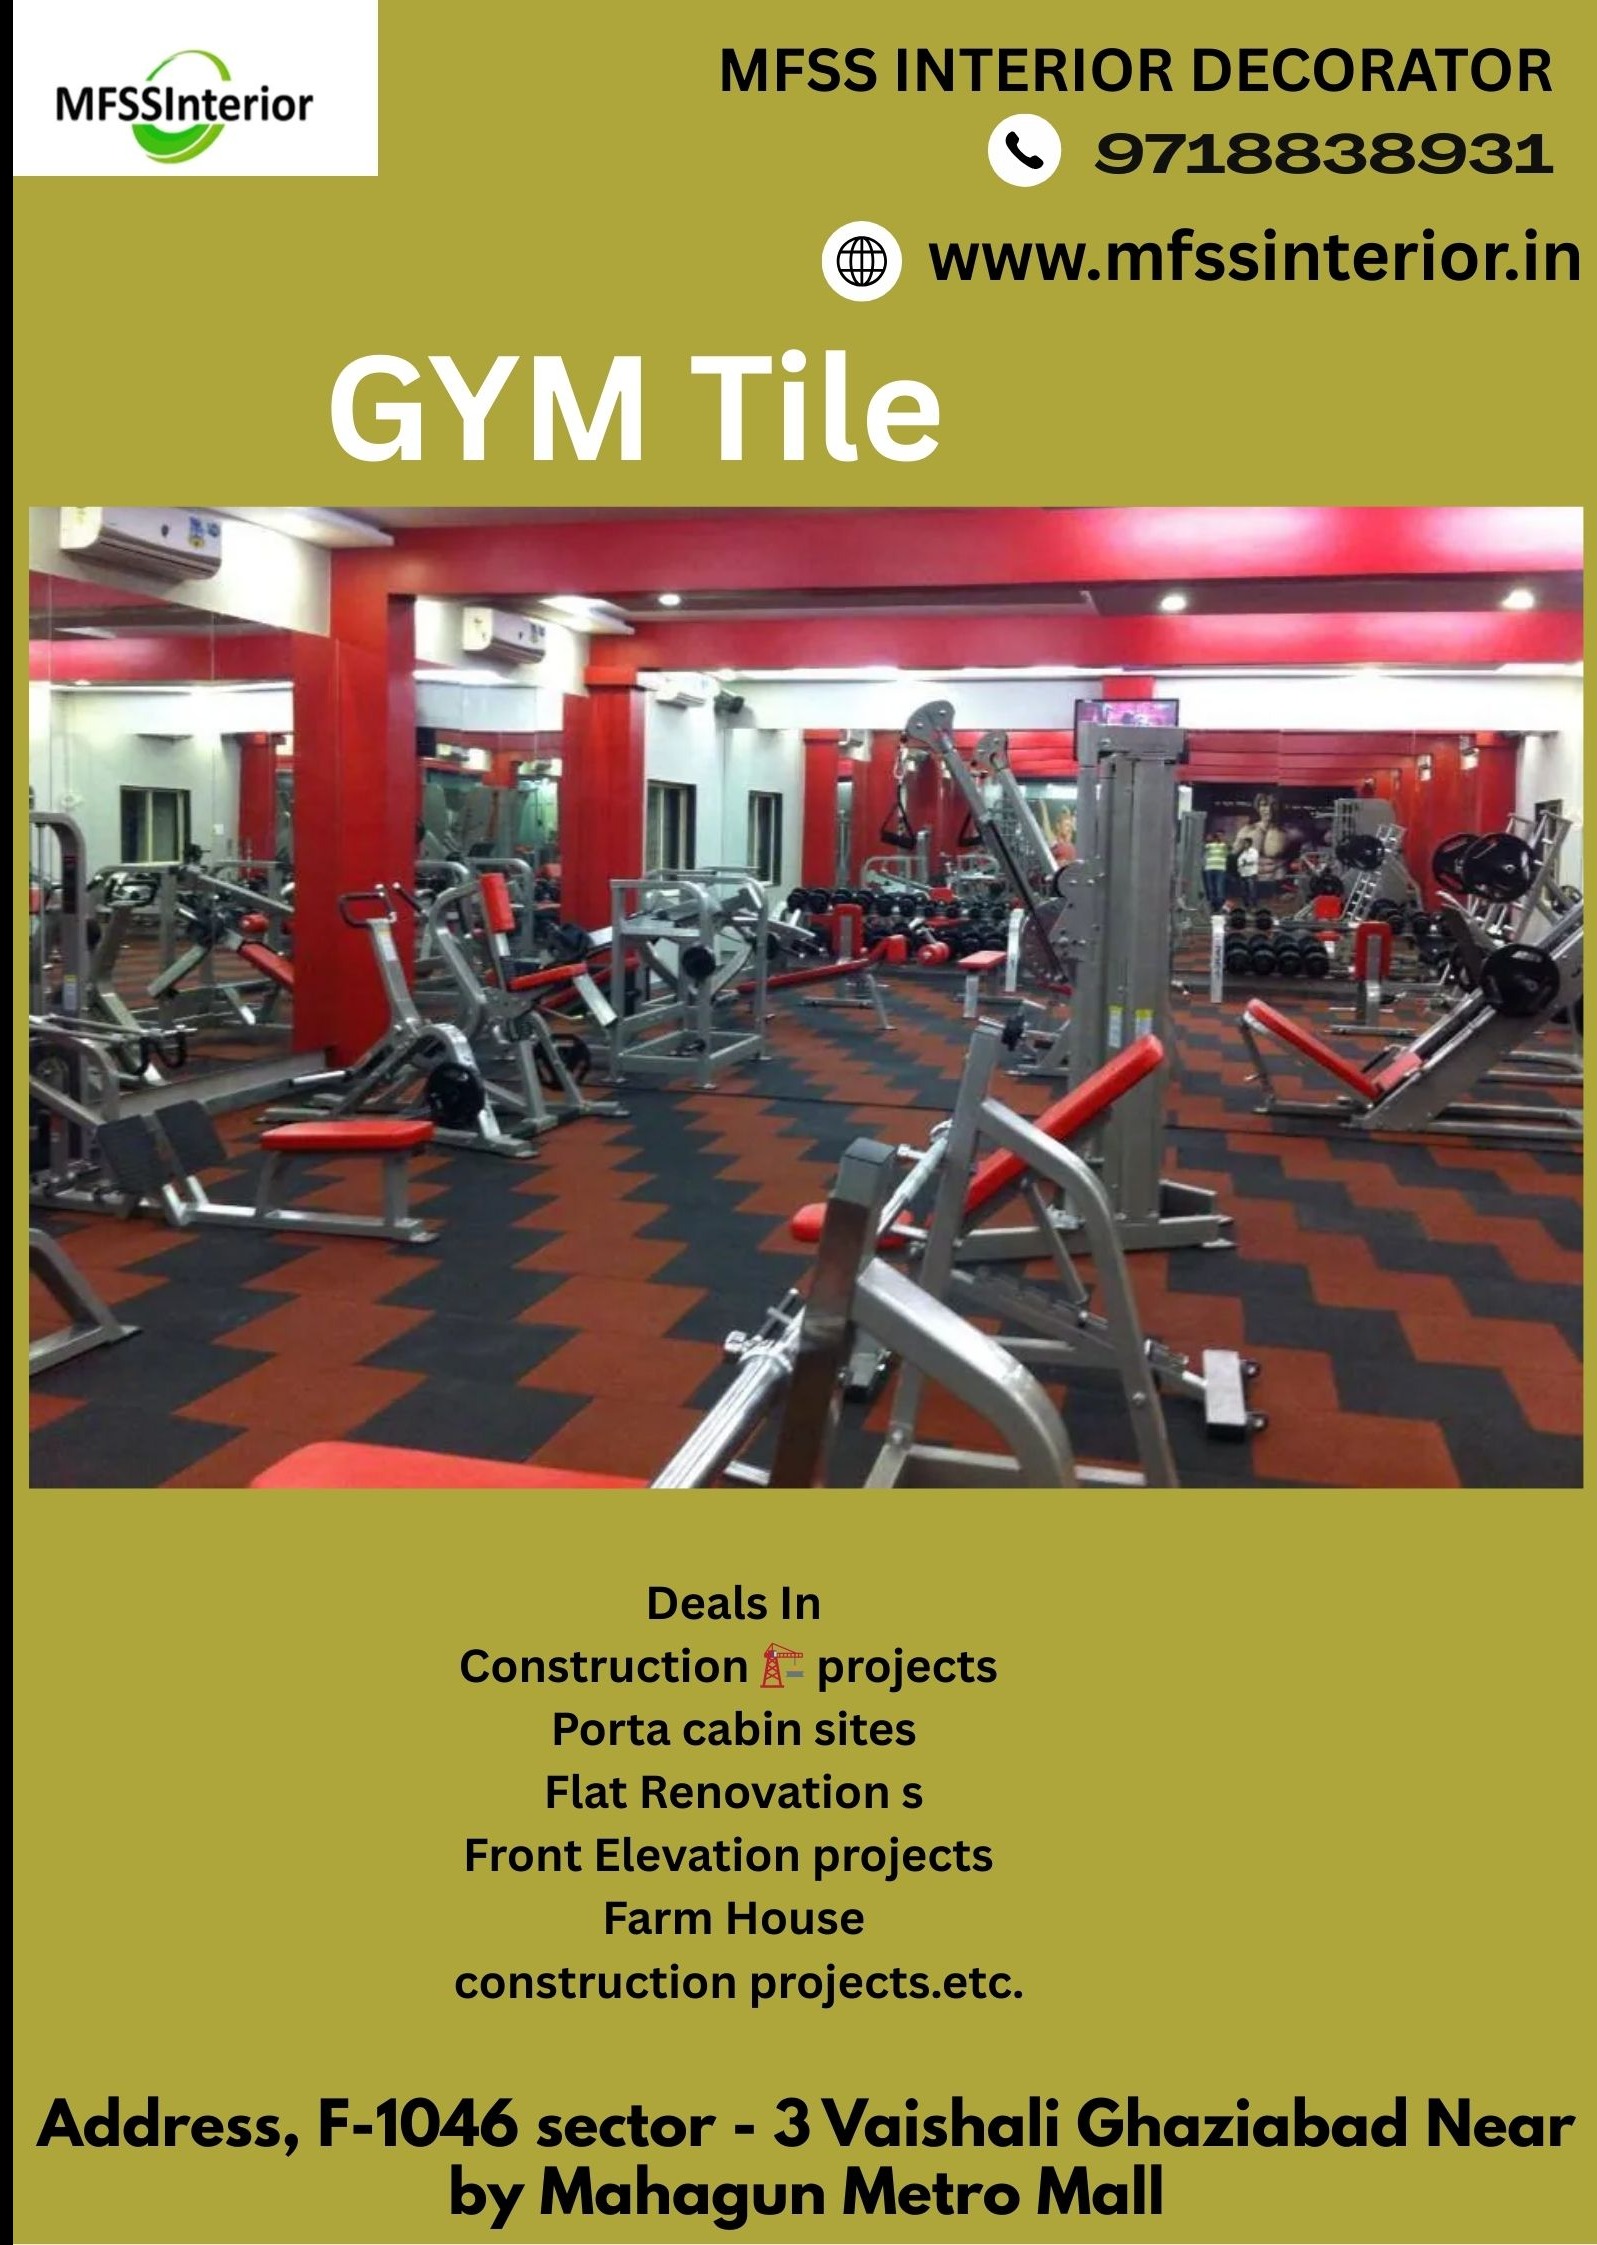

you’re asking about gym tile work (installation process). Here’s a simple breakdown of how gym flooring tile work is usually done: 🔨 Steps for Gym Tile Work Surface Preparation Clean the floor (remove dust, grease, or old flooring). Make sure the surface is level and dry. Planning & Layout Measure the gym area. Decide tile placement (start from the center or a corner depending on the design). Mark guidelines with chalk for straight alignment. Tile Cutting (if needed) Use a sharp utility knife or tile cutter for rubber/foam tiles. For ceramic/stone (if decorative), use a tile cutter or angle grinder. Installation Interlocking gym tiles (rubber/foam): Snap-fit like a puzzle, no adhesive needed. Heavy-duty rubber rolls/tiles: Use adhesive or double-sided tape at edges. Ceramic/stone gym tiles: Apply tile adhesive or mortar, place tiles, and use spacers. Finishing For ceramic/stone: Apply grout between tiles after 24 hrs, then clean. For rubber/foam: Press firmly, ensure no gaps. Inspection & Cleaning Check for loose edges. Mop or vacuum before use. ⚡ Most gyms prefer rubber tiles because they: Absorb shock Protect the floor and equipment Reduce noise Are easy to install and replace Do you want me to make a step-by-step guide with tools and materials list so it’s ready for actual work?


We hate spam too.
